


Tuesday, July 23, 2013
Dresser Sneak Peak
We have a little over a week before the fair and we are in crunch time finishing all our home decor and coming up with a great display! To get the excitement flowing and interest you in hopefully coming and checking out our booth here is a sneak peak at the dresser we refinished and will be selling!

Monday, July 1, 2013
We Accept Cards!
Don't worry about feeling like you need to come to our booth with cash only this year. We're excited to announce that we will be able to accept cards as a method of payment at the fair!

We're in the final countdown as we have just one more month until we set up shop at Ely's Arts in the Park fair! Here's a little sneak peak at the inspiration for our color scheme we've used on the home decor. Make sure to also checkout our Pinterest board for all the other ideas we've used as inspiration to create what we'll be filling our booth with!

Tuesday, June 18, 2013
Vintage Dresser
Check out this vintage find I picked up this weekend! We're planning on giving it some TLC and fixing it up to sell at the fair.

I love all the things that are being done with dressers right now. You can pretty much find a use for them in any room of the house now...not letting it give a room a nice pop of color too!


Right now we are thinking of painting the dresser we found the following colors...teal, a mint green, distressed white or red.
We'd love to hear your opinion on what color we should paint it and what you would use this dresser for!
Thanks!
Saturday, June 15, 2013
Our BIG Announcement!
We are excited to announce that SHA Designs is re-opening up shop for the yearly arts and craft show in Ely, Nevada on August 3-4th, 2013! We previously started SHA Designs 2 years ago for the same fair, but because of school, babies and moving we were not able to attend last year. After realizing how much fun we had doing what we love and being able to sell our handcrafted treasures we decided to get together for another year!
Between next couple of weeks we have before our booth opens, we will be providing some sneak peaks of our redesigned/updated look and style to our shop as well as products. That's right...this year our shop will solely be themed around home decor along with some great refinished furniture pieces. With our modern home decor items, updated color scheme and overall style to SHA Designs we are very excited to put together an "eye-catching" booth for all of you to enjoy!
So please follow us through the next little while to share in our excitement and love for crafting as we provide updates and share with you our journey as we prepare for Art in the Park!
Friday, August 26, 2011
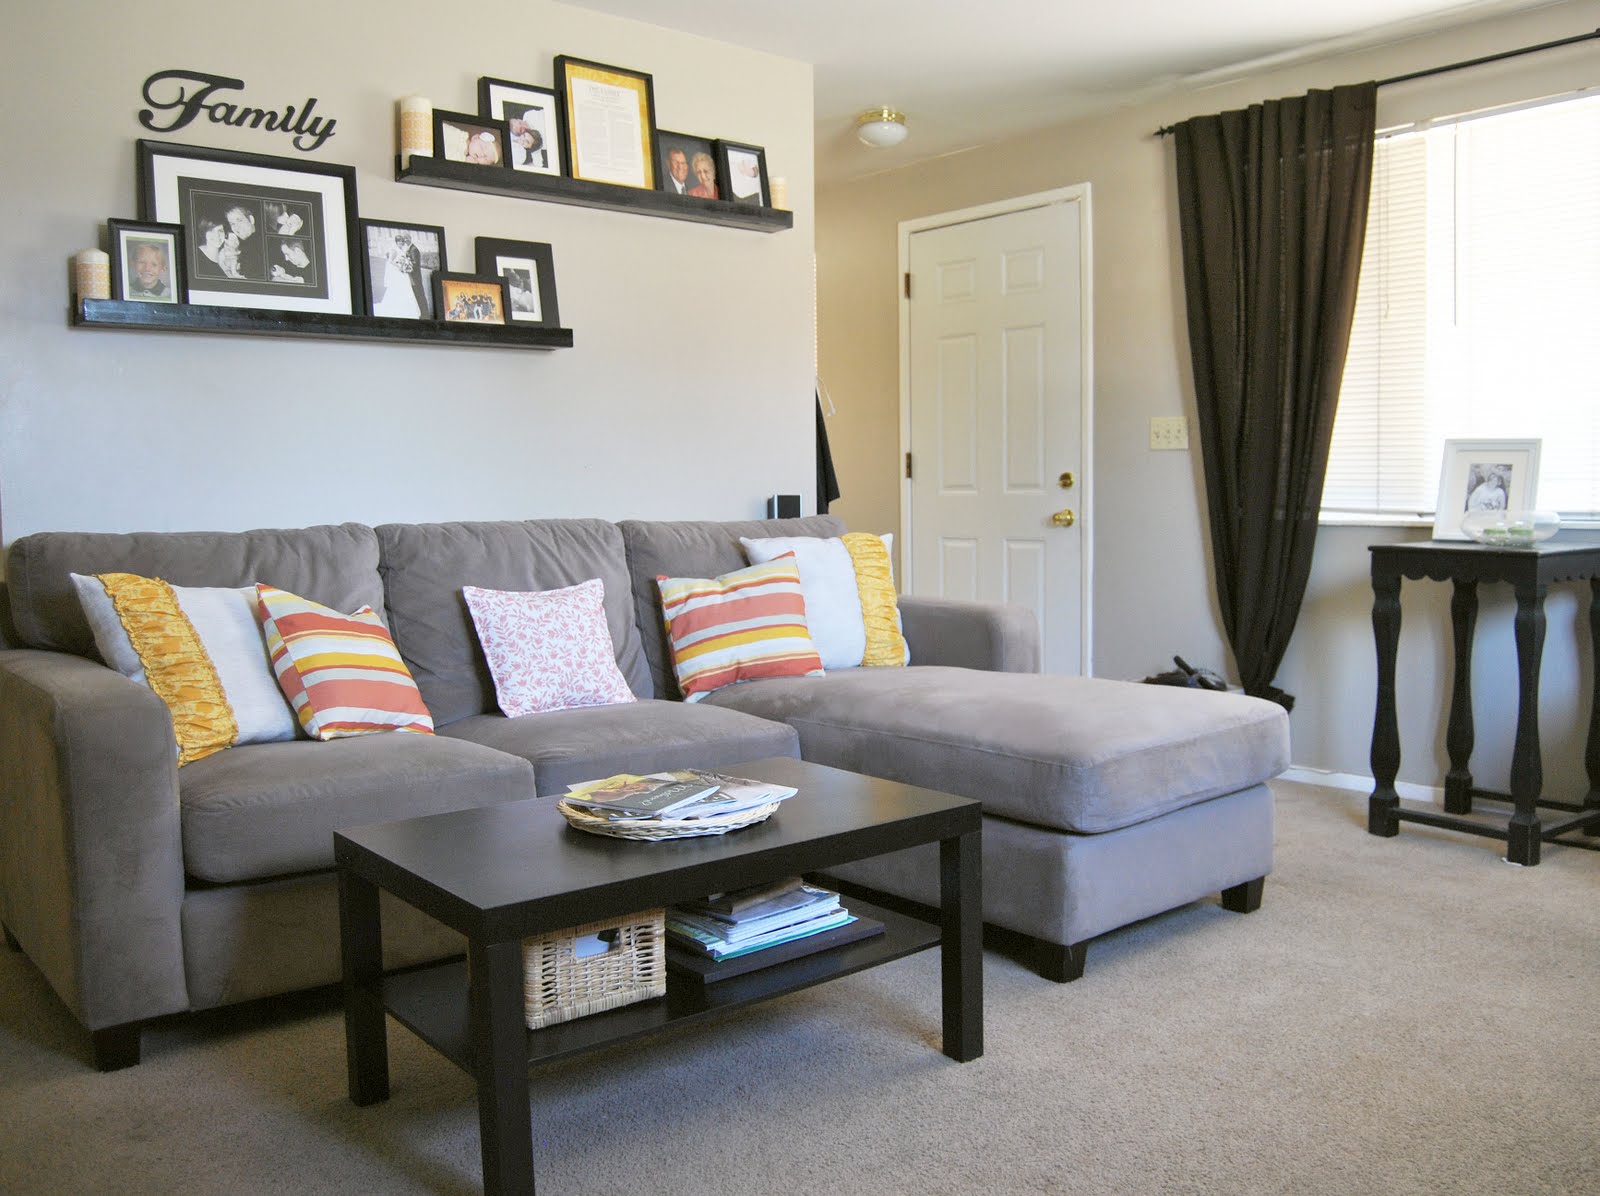
Part 2: Living Room Reveal
Hopefully after reading a few tips on redecorating on a budget you have been inspired to tackle a room in your house! If so we want to see pictures!! Here is a look at my living room. ENJOY!
Since we are just renting right now while my husband and I are in school, I had limited options to work with, including the space and budget. So first off I got my workout for the morning and rearranged all the furniture in the room. This is where I have to apologize, because I thought I had some pictures of the room before and turns out...I didn't! Anyway, I flip-flopped the TV and the couch and put the side chairs on the opposite wall they were originally on as well. My husband was more surprised that I was able to hook back up the TV and the surround sound, once I moved everything, then moving all the furniture. (I'm a little technically challenged!)
Here's a look of the over all room. Sorry, but you'll have to imagine how it was before. When I was toying with rearranging the furniture for a good week or so I wasn't sure how I would like the arrangement that I ended up with, but we love it more then the one before. Moral of the story: Be willing to try new things, you might just like it better!

Since this was also a one day transformation, I decided to keep all of the furniture the way it was without revamping anything major. (Although, I have some ideas for future projects that will involve some of this.) Once I had the major change done by rearranging the furniture, I decided to change up the colors up the room. Painting was out of the question and so was new furniture so I changed the colors of the room through recovering some old pillows and repeating those colors in the accessories I already had in the room.

The accent colors of my living room before were mostly green with some blue. This time I wanted to use some brighter colors. With the pillows I found fabrics that gave me color, patterns, and texture. I then brought the yellow up in the picture collage above the couch by wrapping yellow paper around the candles and using it as the color of some of the picture mats.
So that is the one day transformation of my living room! Some future projects I have to add to the transformation are new wall art above the IKEA chairs, revamping the table lamp shade, and a wall clock on the wall with the TV made out of picture frames.
Thursday, August 25, 2011
Part 1: Room transformations on a budget
If you're anything like me, you get tired for walking into the same rooms in your house everyday; same old furniture, colors, and decoration. If you're feeling the same way about a room in your house, like I was with my living room, then its time to spruce things up and give that room a make-over. Don't worry, redoing a room doesn't have to cost thousands of dollars or even hundreds! I'm going to give a few redecorating tips and ideas that will cost you anywhere from $20 to $100, depending on how much of lift you want to give your room.
Tip #1) Rearrange Furniture: If you're on a really tight budget, like I was when I redid my living room, rearranging the furniture that you already have is a cheap and easy way to bring a big change to a room. Sometimes it can be a little overwhelming trying to figure out a new arrangement for furniture that is already working where it is, but don't be afraid to just start moving furniture around and playing with it. Besides, what could be a better work out for the day!
Tip #2) Revamp furniture you already have or furniture from DI: A popular thing in the decorating world these days is restoring old furniture to give it a new, yet chic and vintage feel. So if you want to add new pieces to your room a great way to do this is by finding things around your house from other rooms or getting cheap furniture from DI or KSL and revamping it. Now just be aware that this option does take a little more time and work, but will leave you with a beautiful and unique addition to your room. Below are some ideas I really liked for revamping old furniture.


 Tip #3) Add color, pattern and texture through your accessories: This section could be endless with all the different things you can do to accessorize your room on a budget, but so I don't overwhelm you I'm going to mention a couple popular tips for accessorizing your room while adding color, pattern and texture.


Tip #1) Rearrange Furniture: If you're on a really tight budget, like I was when I redid my living room, rearranging the furniture that you already have is a cheap and easy way to bring a big change to a room. Sometimes it can be a little overwhelming trying to figure out a new arrangement for furniture that is already working where it is, but don't be afraid to just start moving furniture around and playing with it. Besides, what could be a better work out for the day!
Tip #2) Revamp furniture you already have or furniture from DI: A popular thing in the decorating world these days is restoring old furniture to give it a new, yet chic and vintage feel. So if you want to add new pieces to your room a great way to do this is by finding things around your house from other rooms or getting cheap furniture from DI or KSL and revamping it. Now just be aware that this option does take a little more time and work, but will leave you with a beautiful and unique addition to your room. Below are some ideas I really liked for revamping old furniture.
One of my favorite blogs for furniture revamps is All Things Thrifty


This is something I plan to do someday; turning an older dresser into a TV stand.

Pillows: When needing a change in your room, pillows are a great outlet for cheap change and not to mention they are a very popular home decor item! They also are a great way to incorporate new colors, patterns and textures all in one! When I did my one day living room transformation, to change up the colors of my room I used pillows to do it. I got 4 large pillows from DI for $2 each and went to Home Fabrics bought 3 yards of fabric for under $10! By the way, Home Fabric in Orem is having a store closeout sale. The store is not closing, but they are liquidating fabric. You can get a lot styles for $3.00 a yard! This is by far my favorite store for buying home decor fabrics!


Stenciling: Stenciling seems to be another popular thing in the crafting world. It's another great way to bring color and pattern to your room and accessories. Stenciling is a lot cheaper then wallpaper and less permanent. Here are some ideas that I just love that involve stenciling!
This really cute chevron Stencil Rug by The House o Smiths (tutorial)

Stencil Wall from Good Girl Gone Glad

Another stencil wall from All Things Thrifty

Beautiful wall art from The Idea Room (tutorial)


Gallery Walls and Picture Frames: A gallery wall is a great way to fill a large space on a wall and to also personalize your room. Photo frames can get pricey, but once again, go check out your local thrift store for old frames and paint them all the same color. Doing this will give you a variety of different frames without breaking the bank for home decor.
The House of Smiths has a great post with some tips for creating your perfect wall gallery. Check it out HERE.

You can also use frames for other home decor accessories. The things you can do with picture frames are endless when decorating a room; whether it be a collage, framing a family picture to child's art project or favorite quote, or making a wall clock with frames. Below are some cute wall decorating ideas that I found.


If you don't want to go through all the trouble of figuring out how to hang all your frames in a collage, photo ledges are a great way to display your frame and pictures! Here is a tutorial on how to make these photo ledges. I made some for my living room and they were really cheap and easy to make.

COME BACK TOMORROW FOR MY LIVING ROOM REVEAL!
Monday, August 22, 2011
Button down shirt dress tutorial

My brother Joe came out to visit for Christmas last year. He has always lived a lot farther away then the rest of the family and we love it when he can make it out for a visit! This time when he cam he left a blue button up shirt. The shirt has been hanging around my apartment for a long time. I figured if he hasn't asked back for it yet he isn't planning on it. So I finally decided to do something with it. So I have come up with this simple and cute tutorial for a little girl dress!
First thing i did was measure around my daughters chest. Take that number add 2 inches then divide it in half. That will be the width of your chest piece. Then add four inches. That will be the width of your bodice piece. So say your daughters chest was 20inches around. Add 2, that makes it 22 then divide in half. That makes it 11 then add four so 11; chest, and 15; bodice. (These numbers are made up don't really use them, make sure you measure whoever you are making the dress for! ) Remember these numbers. Lay your shirt out flat and buttoned up. You are going to draw three boxes on the front of the shirt.

The width of your first box will be the smallest number you just measured(11). This is for your chest piece. I guessed how long I wanted it to be I did like four inches I think, three inches for the actual length then one inch for seam allowance. Make sure you center all your boxes over the buttons! This is very important so all the buttons align in your dress at the end. Then draw the second box under it (15). This is for your bodice piece. For the length of this one I measured one of my daughters other dresses to get an idea of how long I wanted it to be. Then i subtracted the three inches from the chest piece. So say the dress I measured was 24 inches long, take that number minus three. So the length of your bodice piece will be 21 inches. Your third box will be the width of the entire shirt. This is the ruffle at the bottom. The length will be how ever much room you have left on your shirt. I think I got like three inches squeezed in there.

Cut out all you pieces. You should have a front piece and a back piece to each box. Keep the front pieces buttoned. Put the front and the back pieces right side together and sew 1/4th inch seam on each side of all three boxes. It will look something like this when it is done.

Then take your chest piece unbutton it lay it out. Take the bodice piece you just gathered and lay it on top of the chest piece pin them right sides together. You might have to pull your gathering out a little. Just make sure you have the buttons on the same side so the dress will button up right! It should look something like this. Then sew 1/4th in seam. Then iron it down really well.

Then take your ruffle piece and align it to the bodice piece. Right sides together and sew 1/4th inch in and iron it really well. Pretty much the same thing you just did. Again make sure to align the buttons on the right side! Just like this.

Now you are going to hem the top and the bottom of the dress. Iron and double roll the top and bottom about 1/4th inch and pin. Then sew around the top and the bottom.
Next you need to make the ties for the straps. I used the sleeves of the shirt and cut out 4; 1 inch wide and and 6 inch long pieces. Then I ironed both edges in to the center then folded it in half and ironed it down again. Then I sewed across it. It is essentially like hemming.
Then I measured the outside of Sophia's arm to the armpit. I buttoned up the dress and took the length of her arm to armpit and measured from the edge off the dress in and that's where I added the straps. Like this.

I just sewed across them. Try to line it up to your existing hem line so you don't have a random extra line across the top. That's it! Your dress is done! It should look something like this on your little girl!

As always you can add all kinds of different options to make it unique. You could add pockets or thick straps that don't tie or fun shoes like Sophia's! Try it out and send us pics!!
~A
Linked up to:


Subscribe to:
Posts (Atom)